वर्डप्रेस वेबसाइट सिक्योर करने के लिए Wordfence Security एक बेहतरीन प्लगइन है। लेकिन उचित Wordfence Settings बहुत महत्वपूर्ण है।
आज इस आर्टिकल में, मैं आपको Wordfence Security Plugin की Best Settings बताऊंगा।
कई ऐसे ब्लॉगर जो Wordfence Security plugin इंस्टॉल कर लेते हैं, लेकिन उन्हें पता नहीं होता है कि Wordfence Security Plugin को कैसे Configure किया जाए।
Wordfence Security Plugin Settings in Hindi
Wordfence फ्री और प्रीमियम प्लान के साथ आता है। Wordfence का Basic plan फ्री है, लेकिन प्रीमियम वर्शन अधिक Advanced features प्रदान करता है जैसे देश Country blocking, firewall rules updated in real-time, scheduled scanning, आदि।
तो चलिए Wordfence Settings को शुरू करते है…
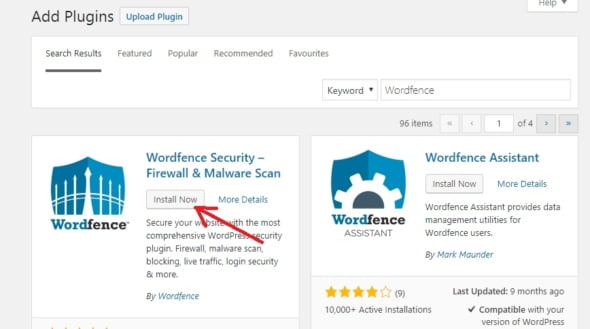
सबसे पहले Wordfence Security प्लगइन को इंस्टॉल करें। इसके लिए वर्डप्रेस डैशबोर्ड में लॉग इन करें, Plugins >> Add new पर क्लिक करें फिर सर्च रिजल्ट में Wordfence सर्च करें। सर्च रिजल्ट में Wordfence Security प्लगइन दिखाई देगा, बस इंस्टॉल पर क्लिक करें। आप नीचे स्क्रीनशॉट देख सकते हैं।
प्लगइन Activate होने के बाद, आपके वर्डप्रेस डैशबोर्ड में एक नया मेनू आइटम “Wordfence” जोड़ देगा।
जब आप उस पर क्लिक करते हैं, तो यह आपको Wordfence security settings overview दिखाएगा। इसके अलावा, आप Security notifications & stats like recent IP blocking, failed login attempts, total attacks blocked आदि देख सकते है।
Wordfence Firewall Setting कैसे करें
Wordfence >> Firewall >> Manage Firewall पर क्लिक करें।
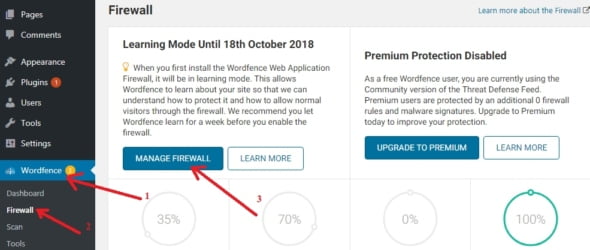
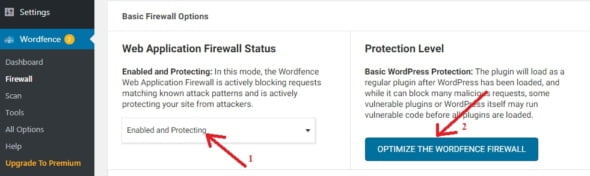
अगले पेज में, Web Application Firewall Status में स्थिति ड्रॉप-डाउन मेनू से “Enabled and Protecting” आप्शन सेलेक्ट करें। फिर “Optimize the Wordfence firewall” पर क्लिक करें।
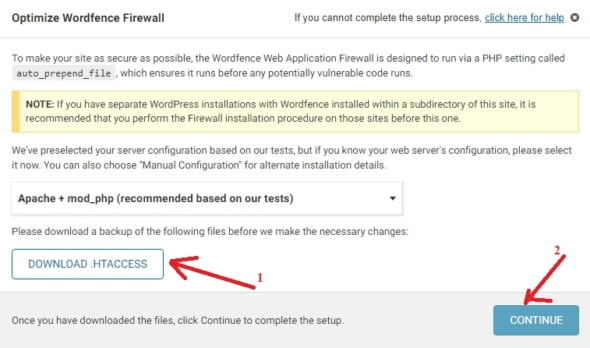
अब, Wordfence आपके Server configuration का पता लगाने के लिए कुछ Test चलाएगा और आपकी Current .htaccess फ़ाइल को बैकअप के रूप में डाउनलोड करने के लिए कहेगा। “Download .htaccess” बटन पर क्लिक करें और फिर Continue बटन पर हिट करें। आप नीचे स्क्रीनशॉट देख सकते हैं।
अब यह आपको Installation Successful notification दिखाएगा।
Close बटन पर क्लिक करने के बाद, आप फ़ायरवॉल पेज पर रीडायरेक्ट हो जाएंगे, यहाँ आपको Protection level “Extended protection” दिखाई देगा।
आपको एक “Learning Mode” बटन भी दिखाई देगा। चिंता न करें, यह एक सप्ताह के बाद ऑटोमेटिकली “Enabled and Protecting” मोड में बदल जाएगा।
Wordfence Security Plugin का उपयोग करके WordPress Blog Scan कैसे करें
बस Wordfence >> Scan ऑप्शन पर क्लिक करें और फिर “Start New Scan” बटन पर क्लिक करें।
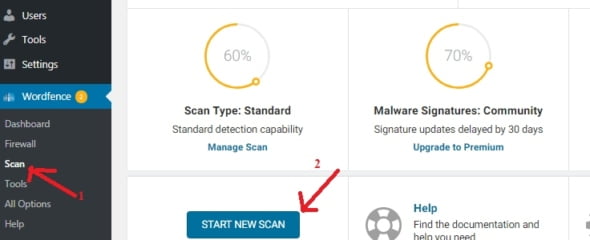
Wordfence security अब आपकी वर्डप्रेस साइट को स्कैन करना शुरू कर देगा। यह WordPress core, theme file, plugin files, suspicious codes, backdoors, malicious URLs और बहुत कुछ स्कैन करेगा।
अगर यह आर्टिकल आपके लिए हेल्पफुल साबित हुई है, तो इसे शेयर करना न भूलें!
वर्डप्रेस साईट सिक्योर करने के और भी आर्टिकल:
Awesome article. Great.
very helpfull article